MY CRAFTING ADVENTURE

My journey through crafting collecting goodies along the way x

Monday 7 December 2015

Classic Vase of Apple Blossom

Good afternoon folks, I am so pleased it decided not to rain all day today unlike the whole of the weekend when I got totally drenched more than once whilst out doing the shopping unlike some people who had the luxury of sitting in front of their TV and not having to move an inch, mentioning no names Mr. B now moving on to nicer things to talk about namely classes for this week.
I thought we might keep the floral theme going as Christmas is just about upon us and I'm hoping to get the tree up and sorted this week so before all of that this is a little look forward to the Spring even though winter has only just begun and one thing I'm sure of it's bound to get much colder before Spring is anywhere near arriving.
This week one Classic Vase Die and one Apple Blossom Stamp set both from Creative Expressions by Sue Wilson.


I'm sooooooo pleased that I have managed to get my photo's back, so far so good lol!!!


Here's a quick look at some of the items I have used, I did use a touch of my Clear Sparkle Pen mixed with my ink to paint the flowers with, I used a fine tip paint brush as some of the flowers are quite small.


You can't quite see the sparkle on the flowers in the picture.


In this photo it shows I have coloured the die cut vase with some blue Colour Cloud ink.


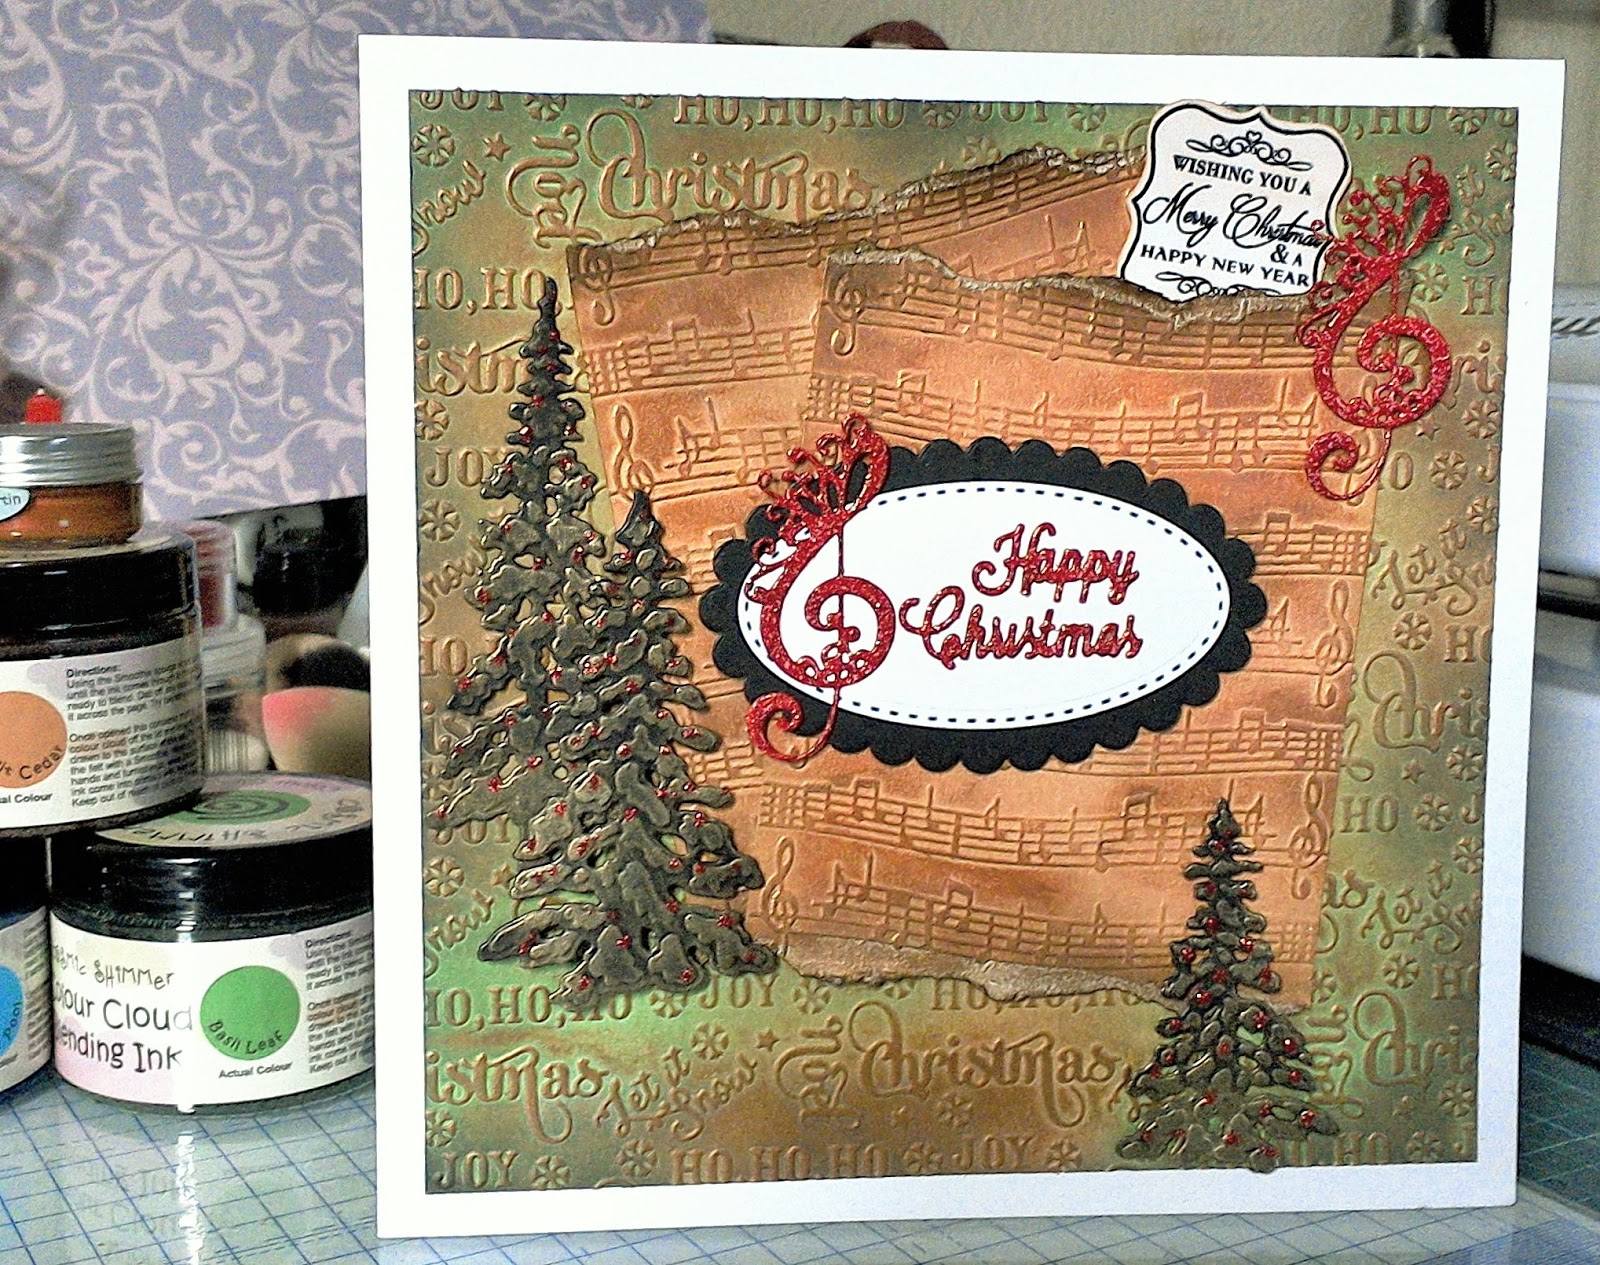
Cards are 8x8 and 6x6.

I have to say thanks to John Lockwood for the inspiration on the larger card with the three panel layout on.

I painted the background of the vase with Diamond Starlights paint.


I have used Shabby Shutters and Cracked Pistachio Distress inks to create the background.

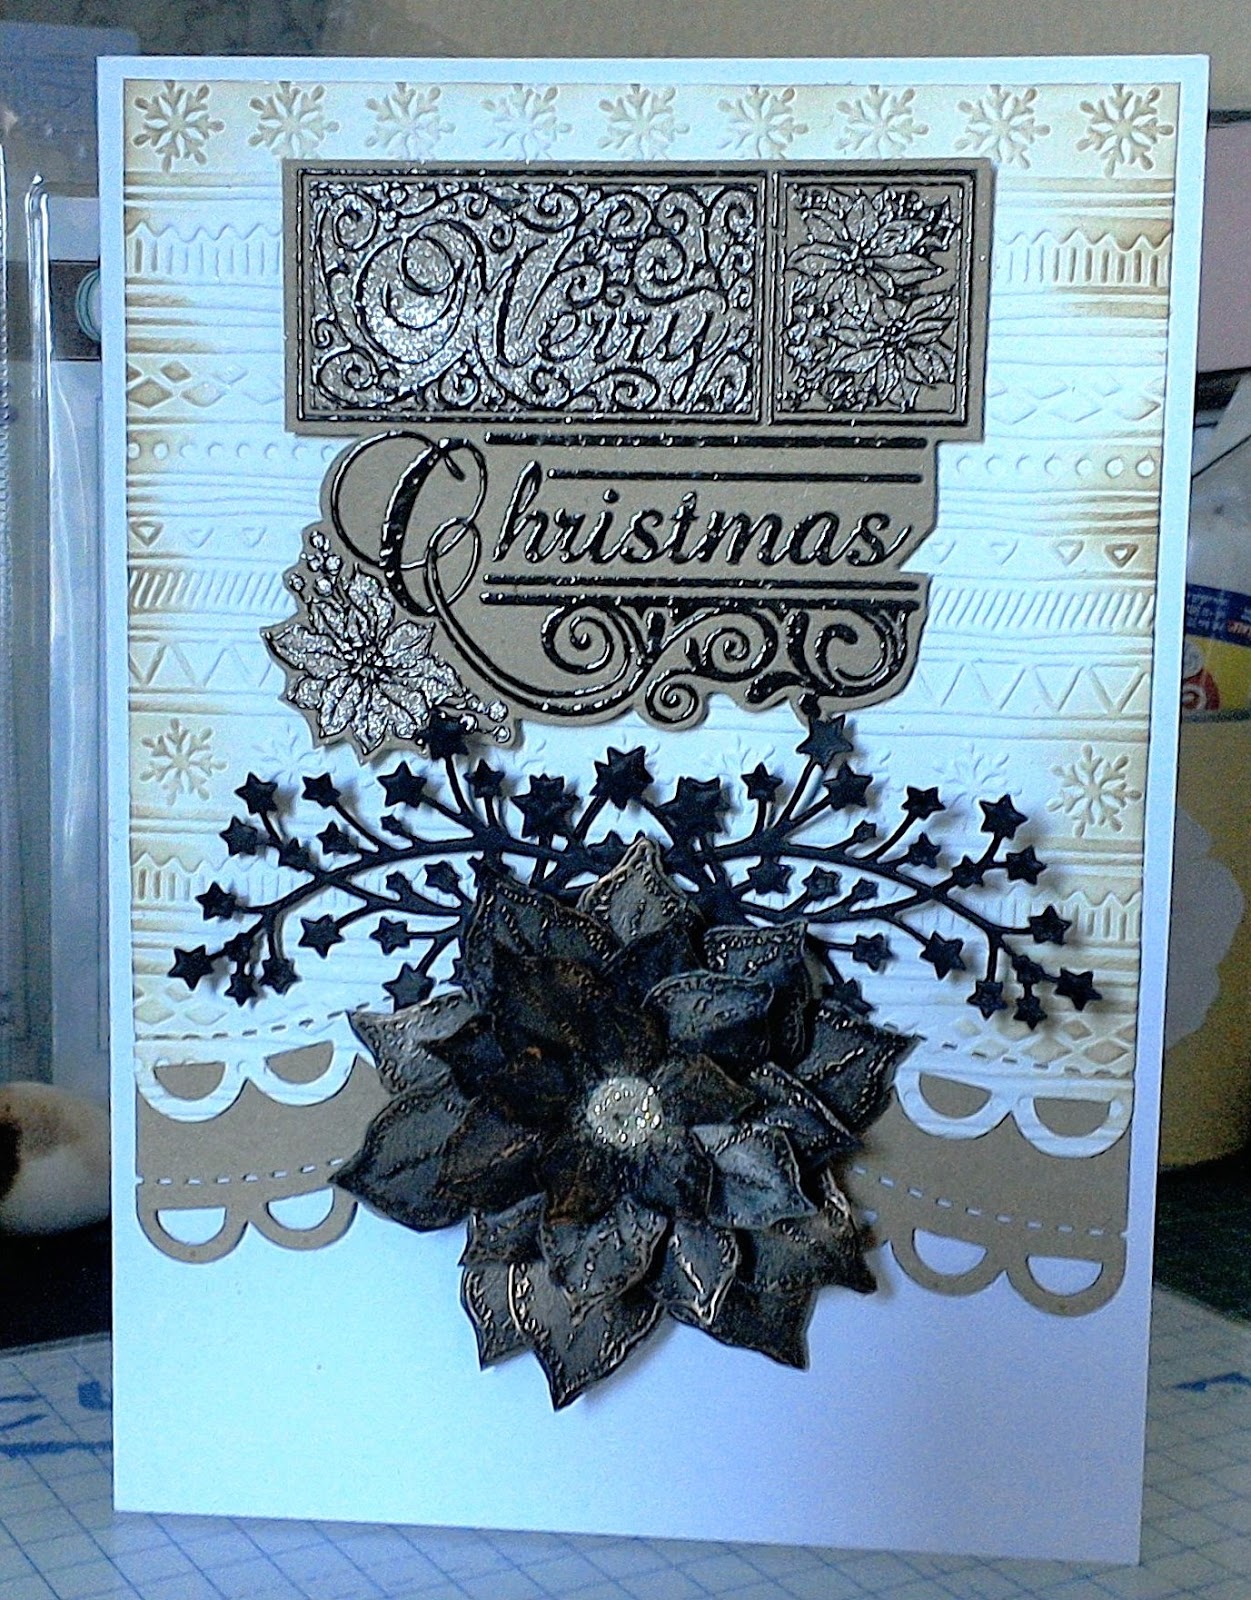
This one is all me ! Really liked the background I made but you don't see the true colours in the flowers until the card is in front of you.

The sentiment is included with the Apple Blossom stamp.


As you may be able to see I have stamped and embossed the blossoms and cut them out with my craft knife and scissors before painting the flowers.

Just thought I would show a picture I took on Friday afternoon from my sister's kitchen window, squirrels feeding their little faces, there was at least six of them running a muck but I just couldn't get them all in the photo at the same time, you can stand as close as you please and they don't give a monkey's but get your camera out and they certainly know how to avoid it, typical !


See you soon  : )

Wednesday 2 December 2015

Back to Floral with Sara Davies

Good evening sorry I've not bee able to post sooner for those of you who will be coming to class on Thursday we will be recreating a couple of the cards from demo day by popular demand and far from it be not for me to oblige, so be it. We are going to use the new Lattice and flower dies as well as a couple of embossing folders, so it will be quite an easy and relaxed class for this week, if  you managed to get any of the dies on the day then bring them with you and this will cut down on your waiting time.
Here are a couple of photo's to give you some insight but please note that the colour of cardstock and patterned paper may vary, my pictures are shown in black and white because the lighting was so terrible and this was the best way to how them, the flowers are all cut from pink and green whilst the background is white, not sure yet as to what colour cardstock we will use for the trellis card I will decide on the day. Hope this makes some sense.

OK, despite having tried over and over and over you get the picture, well in fact that's exactly what you won't be getting for some very strange reason internet explorer won't allow me to download any photo's and I think that its something to do with my Google account so it might take me quite some time to sort it out so all I can say is sorry folks if I get it sorted in time I'll add them in later, that's the best I can do for now so see you soon, hopefully x
Sheilagh  : (


Sorry could only manage black and white photo's, the card is white on white and the flowers are in pink and green patterned papers. The flourishes have been die cut from Century Pearl Hint of Silver.

The rose embossing folder is from Sara's new Floral range and it's beautiful.


Here you can see I have used the Lattice die on one of the cards and it cuts like a dream.

Monday 23 November 2015

Gilded Poinsettia for a Merry Christmas

So sorry for any disappointment caused last week with the lack of our crafty classes but Guess what? HELLO, yes I'm just about back in the land of the crafting after spending the last week in my bed yet again for the third time this year with an horrendous cold and chest infection so I'm feeling totally drained of all my crafting energy but I hope you are all well and crafting fit at the start of an extremely cold Monday so keep warm won't you as I don't wish anyone feeling like I did over the last 9 days or so, anyway I did manage to make two cards for us to recreate this week even though it took me most of Friday as my energy levels were at zero. At one point I even resorted to putting a drop of brandy in my coffee and  I don't like it at all but my mum always insisted on giving it to us in our coffee when we were feeling poorly and as we are all aware that MUM'S know best !! don't know if it helped but I did get the cards finished and I can tell you that was the longest time I have ever spent trying to complete two cards so with that in mind it should take you no time at all to do in class.
Well it's back to Christmas this week with two stamps both from Creative Expressions Shaded Poinsettia and Merry Christmas hope you like them.
 
Above you can see the stamps and dies I have used.


Sorry that the photo quality isn't up to scratch but it's hard to take a good picture when you are coughing your head off.
One of the borders has been cut from Glitter card.


The Poinsettia has been stamped onto pink cardstock and embossed in Clear Powder, Silver Gilding Wax was added after cutting out.

The green ink I used is Bundled Sage, the embossed background is Snowflake corner from Sara's Signature range along with the border die.
Merry Christmas is in Black Versafine and clear powder.

Both cards are A4 half fold.
I have kept the colours really neutral on this card and I'm not sure whether you will be able to see it in this photo but I have used my Clear Sparkle Pen to highlight some of the sentiment and it looks far better in real time, it works so well on the Kraft card I was really pleased with it.


This time I have stamped onto black cardstock and embossed with my clear powder, cut out and the Silver and Renaissance Gold Gilding Wax applied.

The background has been embossed in one of the folders from the Nordic range from Crafters Companion and die cut with Sara's border die.
Distress inks around the edges - Vintage Photo or Gathered Twigs.

The Star Spray die is from Creative Expressions


That's it for now think I'm done, need to go and summon up some energy from somewhere so if anyone has any to spare I'd be very grateful x if not it's back to the Lucozade for me  Yak!

See you soon I hope x

Monday 9 November 2015

Say it with Flowers.... - ... Creative Expressions ... With Love or Thank You and a touch of Sara.

Hello to you all and I so do apologize for posting this late it's been one hectic weekend for me, I'm still not over it yet, feeling very tired and in need of a boost in the energy department. Not only have I had to unpack and reorganize all of my craft entourage i.e. demo products, dies of various descriptions, cardstock, embossing folders, glues, ink pads, tools, equipment, paper pads, etc. etc. etc.
Everything but the kitchen sink lol! and trust me I'm not laughing it all takes it's toll, as for the demo day it was much more hectic than I could have possibly imagined and I'm still trying to recover as Sunday was almost as busy, well no not really just didn't get chance to take time out and re-group so to speak so I have only had today well half of today to prepare for our classes this week and thankfully Louise had already given me some of Creative Expressions Stamps to work with so here's what I decided to do with them.
As always I have made two cards for our class, the first one is..... wait for it...... ha! ha! .....7x7 oh see you were so not expecting that lol!  and the next is Mmmm!! a little different, you'll just have to wait and see........ all shall be revealed.
I guess our first card is quite floral and feminine because it includes butterflies and also has a subtle hint of sparkle.
Our second project is more of a shaped card but still has the floral theme and the  Poppies seemed to be very relevant at this particular time, but they are also very popular throughout the rest of the year.
Don't want to go on too long so I'll just show you what I came up with and finish off because I seriously need to switch off for a good few hours before I blow a fuse. I'm convinced  I know that I don't sleep walk but I'm pretty sure that I can die cut in my sleep and probably emboss to perfection like a crafter possessed. Ok before I go into meltdown here's our class for this week :  )
So here's the thing can't get any good photo's at this time so I  will post them a little latter, just to let you know I have used Colour Cloud Inks Lemon Meringue, Rose Blush, Crimson Kiss and Basil Leaf.  Also used Distress inks Mowed Lawn and Fired Brick.  Black Versatfine and Clear Powder. I added a touch of Starlight paint Cyclamen and Menthol to the flowers on the Dragonfly Mini Striplet stamp and some Diamond Sprinkles glitter to the With Love sentiment and the Poppies stamp.
OOOhhh!! How exciting you can't see what your going to be doing but you know it's going to be good ha! ha! lol!!!
Don't panic Mr. Mannering it will be alright on the night or do I mean day xxx.
Still very poor light so couldn't get one decent photo, oh well!


As you can see in the photo the Starlight paints in the background which I have used on the flowers and grass on the main image panel.


The butterfly embossing folder is from Sara's new range


I know you can't really make it out but I have added some glitter to my die cut sentiment.


I have created a small rocker card and made a rosette to put the main image panel onto.

I have stamped and embossed the poppies in Clear Powder before stamping again with my Fired Brick Distress ink.
Again a touch of glitter has been added to the flowers.


The swirls have been die cut from silver mirror card.


The stamp sets are from Creative Expressions and the Watercolor Poppies are designed by John Lockwood.

See you later. : )

Monday 26 October 2015

The Music of Christmas

Good afternoon to you all, I hope  that you are all well and in fine crafting spirit and no I don't mean the gin or the vodka but if it helps then so be it, each to there own method of boosting the old mojo lol! I have to confess I've just had three pieces of delicious Galaxy Salted Caramel chocolate that I had leftover from last week purely to boost the energy levels you understand and here's the empty wrapper to prove it, such a pity that there was only three left it's absolutely Scrumptious: ) you should really try it !!!! 
Ok enough talk about chocolate lets move on to our classes for this week.


This week I have chosen to use quite a few products from several different companies, my main focus was upon the free embossing folder that came with the Inspiration magazine by Crafters Companion as I know so many of you have invested in it, along with a rather sweet little die that we have not used before and it's a music themed die called Treble Clef and is one of the Intricutz Dies by Couture Creations.
Although both these products are geared towards everyday designs I've teamed them up with the Winter Trees and the Holly sprays from Sue Wilson and a couple of sentiments from Sara and Crafters Companion and guess what?.......... they all worked perfectly well together so I went along in keeping with  the Christmas theme  and came up with theses two cards.
Once again you can't really see the true colours in the photo's so you won't get the best view of the Gilding Wax in the background of the 8x8 card, oh well not to worry you already know that they always look much nicer in real time.

Just peeking in at the side of this picture  you will see that I have used the Colour Cloud inks to create the backgrounds of both the large and smaller panels which have also been embossed.


The Treble Clef has been die cut out of red card that has a layer of Stick-it on top, then sparkle red embossing powder from Cosmic Shimmer has been applied before heating with my heat gun, the same goes for the sentiment Happy Christmas which is from the Only Words by Die'sire range from C C
The red glitter glue on the trees is by Imagination Crafts.

 
Card two is 6x6.

Music embossing folder free with magazine.

This time I have changed the colours to blues and the Treble Clef has been die cut and then painted with the Orchid Starlight paint but for some reason it appears to look more like black in the photo, oh the wonder of technology lol!


Not a lot of elements to this card therefore not much effort is required making it a quick make and that's a good thing if you have quite a large number to get through in time for Christmas.

Empire Gold Gilding Wax
Pumpkin gilding wax (Phil Martin)
Black Versafine
Colour Cloud Inks :-
Sunlit Cedar
Basil Leaf
Turquoise Pool
Indigo Mist
Clear Day
Distress ink Walnut Stain


Think I've just about finished now so see you at class : )
Sheilagh x


Monday 19 October 2015

According to the Angels

Hello there, and according to me there's going to be crafting this week lol !! Of course I'm playing words as if you hadn't guessed already, if not then it may all be come clear once you have seen what we are going to be making this week. I have once again teamed up two brands for our cards as I thought that they worked so well together. The Angel die is by Sue Wilson and I have also used the square Accordion die and the Holly Overlay die to create a frame.
The background is Centura Pearl cardstock embossed in a snowflake folder then both Gold and Silver Gilding Wax applied with Cut n Dry foam. The Angel is die cut from white card then coloured with a touch of Barely Nude Colour Cloud ink and highlighted with the Gilding Wax. The centre panel within the frame is Parchment which has been embossed in one of Sara Davies folders from her new range.


Here's the first card, it's an 8x8.


As you tell the second card is smaller in size and I wasn't sure if the Angel would work on a 6x6 but it does, I think it's because I kept it plain this time.


The background on this one is white card which I coloured with the Clear Day Cloud ink, but before  I did that I have die cut the center out and then both pieces have been embossed in the new Sara Davies folders from her Signature range.


Heads up people this week you will be die cutting just a bit lol !

 I have used my dries clear Tacky glue and 3D foam pads for the frame.

Cut n dry foam to apply my gold and silver gilding wax.

Hope you're all well and I will see you in class this week.
Bye for now x
Sheilagh

Monday 5 October 2015

Seasons Greetings or Merry Christmas - with Sue and Sara

Good afternoon to all, hope the weather is brightening up where you are it was quite miserable and wet this morning for us but it's dried up now however there's still a lot of clouds about. Going to make this post short and sweet as I want to try and achieve some form of order in my craft room so that means much tidying is required before I can attempt any more sample making for my next demo in a couple of weeks time with the very new collections from Sara Davies Festive Wonder and Butterfly Lullaby which I have to say are both yummy so I'd better get a move on.
As you will see I have used a couple of the sentiment die's from the Festive Wonder range and teamed them up with a rather beautiful Poinsettia Mini Striplet die from Sue Wilson's Festive range. I really enjoyed using this die and I'm sure that it could well be used for lots of other cards and not just Christmas, think I will have to add this one to my stash.
So let's see what you all think, I found it a dream to use..................

This is an 8x8 card and I have die cut the Striplet from Kraft card and embossed each panel then added some Renaissance Gold Gilding Wax with a piece of Cut n Dry foam.


The centre panel has been embossed in the Snow Flurry folder from Sara's Signature Collection and so is the Merry Christmas die cut


Card two is also an 8x8

I have chosen the Red Starlight paint to create a border backdrop and again behind the poinsettia die.


The large panel has been embossed in an A4 folder.


The Seasons Greetings is another die from the Signature range but this time I have painted it with Black Starlight paint after die cutting as this avoids wasting your paint.
The outer frame around the poinsettia's is mounted on a double layer of foam pads but the panel itself is glued down flat.


As usual both cards look much nicer and more colourful in real time.
Hope you like them.


Before I finish can I just say that my thoughts are with one of our lovely ladies today whose husband passed away this morning after being poorly in hospital, just wanted to say we are all thinking of you and sending our condolences.
Sheilagh

Monday 28 September 2015

Looks like Winter - free stamps from Crafters Inspiration Issue 8

Hi! Thought we would stick with the free stamps from the Crafters Inspiration issue 8 magazine for this week as they are such good value and very easy to use and there's plenty of crafting inspiration in side the magazine as they have made it easy for you to get you started.
I started with a 7x7 square base card and created four image panels by colouring the backgrounds before stamping the trees in Black Versafine then highlighted each panel with my Silver Starlight paint to create a  frosty look around the edges. I used my Aqua Tints for the backgrounds but you could use the Colour Cloud inks or anything similar. I added a little of my Cosmic Shimmer Diamond Sprinkles with a glue pen as a finishing touch.
On the 6x6 card I created the background by using two colours of Starlight paints and a piece of Cut n Dry foam to apply onto the card and when it was dry I embossed it in a snowflake folder. The image panel was again coloured with inks and dried before using an anti static bag then stamping the trees in Clear ink and embossing with Silver Powder. The small Candle image is one of the free stamps, Black Versafine ink and Clear Powder to emboss this time.


You can see what a good effect the starlight paint has around the outside edges of each panel.


I thought this card would also be good for a winter birthday card, especially for a male using these colours but could quite easily be made for a female in different colours.


I added the glitter to the candle but you can't really see it in this photo.


Well that's it for now I'll see you all soon I'm off to start cooking some tea before I fade away of starvation lol! Like that's ever going to happen

: )

Monday 21 September 2015

Crafters Inspiration Issue 8 + Xmas Fancy Edgeables

Hi everyone, it's that time of the week again and I'm feeling my age today after having a busy weekend with my youngest Granddaughters christening and now I'm totally drained of all my energy, think it might take me the all week to recover lol!....
Any how I have managed to finish the class cards for this week and I thought we would combine the latest issue of the Crafters Inspiration magazine along with the new Xmas Edgeable dies. I decided to test one of the projects out in the magazine and use the lovely set of stamps that comes included as part of the free gift. They really are great value for money these magazines!! full of inspiration, and I'm pleased to say that the card design I chose worked out really well. You will need to bring your craft knife for this one and a metal edge ruler.


Here's the stepper card from the magazine only finished off in a Christmas  design, in the mag they used a butterfly design.


The Kraft card panels have been embossed in a Snowflake folder and then highlighted with a White Ink pad, I think this looks ever so pretty.

Versatfine black has been used to stamp the sentiments.


The die cut bells are from the Classique Die'sire range and have been cut with double sided sticky onto white card then Cosmic Shimmer Ice Snow added for that glitter effect.


This card has been created from a 6x6 card with the Bows Fancy Edgeable die, I have teamed it up with the Harlequin embossing folder which comes with the Cut n Boss die cutting machine, some Silver Gilding Wax and the main image panel has been created with inks and the free set of stamps from the Crafters Inspiration magazine.
I have edged the main image panel with the tiniest amount of my Black Starlight paint.


I added a touch of glitter with my glue pen just to ground the stamped trees and give that look of winter.


I do think that the Bows die would work for any type of card they are not necessarily just for Christmas, as would the trees stamp so you are getting both value and versatility for your money which is what us crafters really want.


That's all for now, hope to see you all soon.


For all the lovely crafters that aren't feeling well at this moment I'm sending you lots of hugs and feel better soon : )
Just repaying all the kindness I have been sent
in the past xx