MY CRAFTING ADVENTURE

My journey through crafting collecting goodies along the way x

Wednesday 14 December 2016

Fantasy and Roses. House of Zandra

Hey there, hope everyone is feeling a little more festive and I am seriously running out of time to get everything in order and sorted for the big day, well I say the big day but for us our big day is usually Boxing Day, that's when all of my lot (and there's quite a lot of them) all come for Christmas dinner and believe me it can get very noisy with all the little very excitable munchkins running all over the place and that's just the grown up's lol!!!
Enough of that now it will happen soon enough and I for one will be on the last minute as per usual so nothing new there then.....
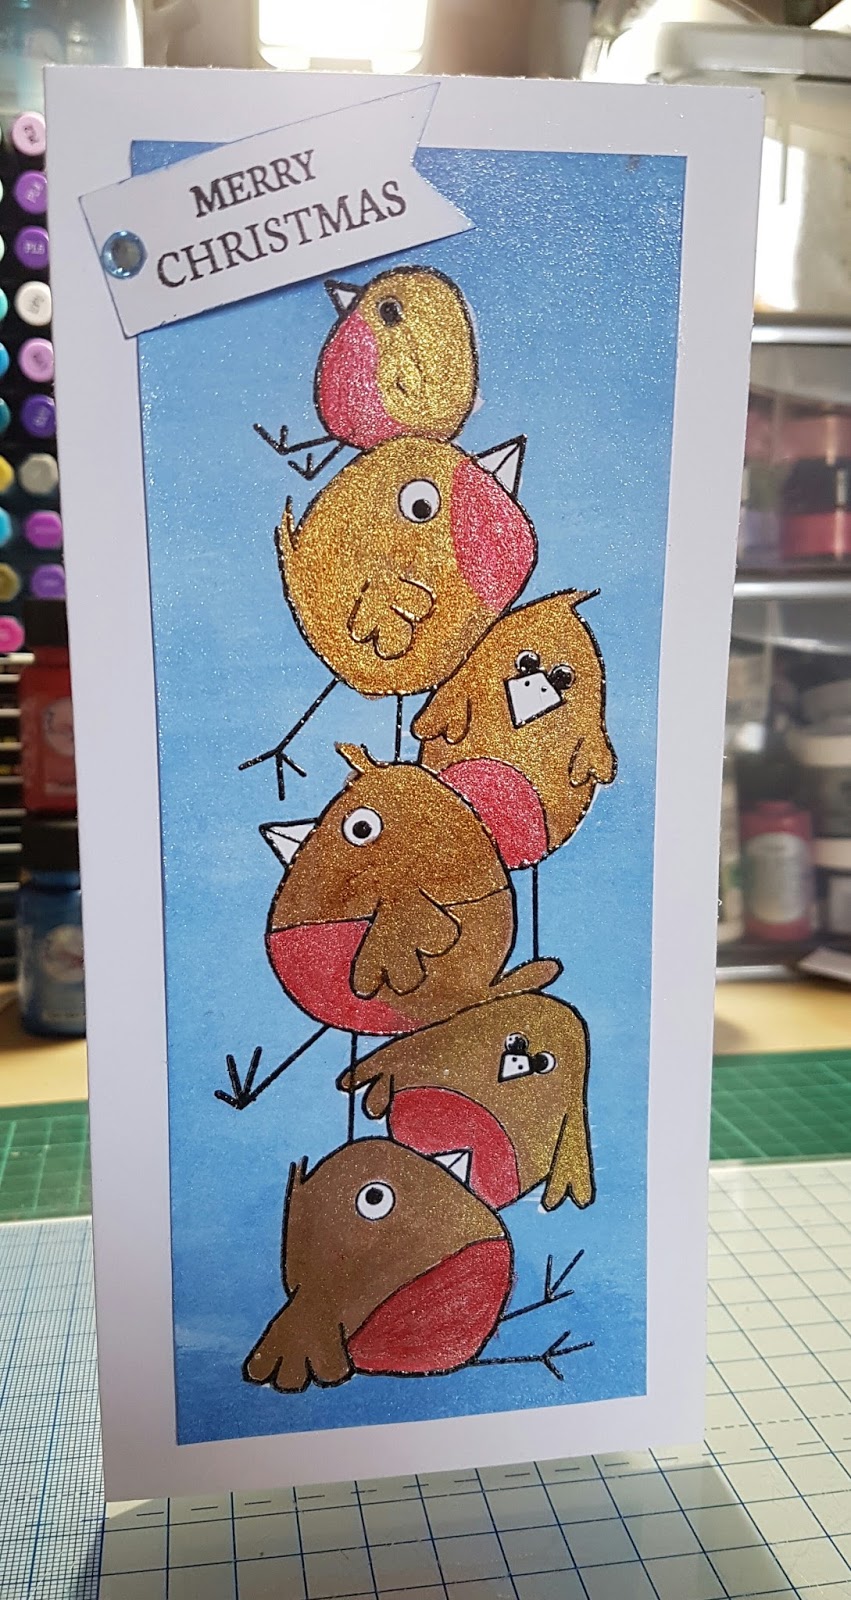
So for our very last classes of 2016 we will end our year with something a little different and it won't have anything CHRISTMAS in sight. I have chosen to make one of the cards with a very nice Decoupage sheet designed by The House of Zandra. Its a little on the fantasy theme style with a peacock type bird amongst some lovely flowers and I have to say it looks ever so pretty. Our second card is also rather sweet and on a smaller scale to one that I made at our last demo day at the shop and it was requested to be done in the class so I have obviously obliged.


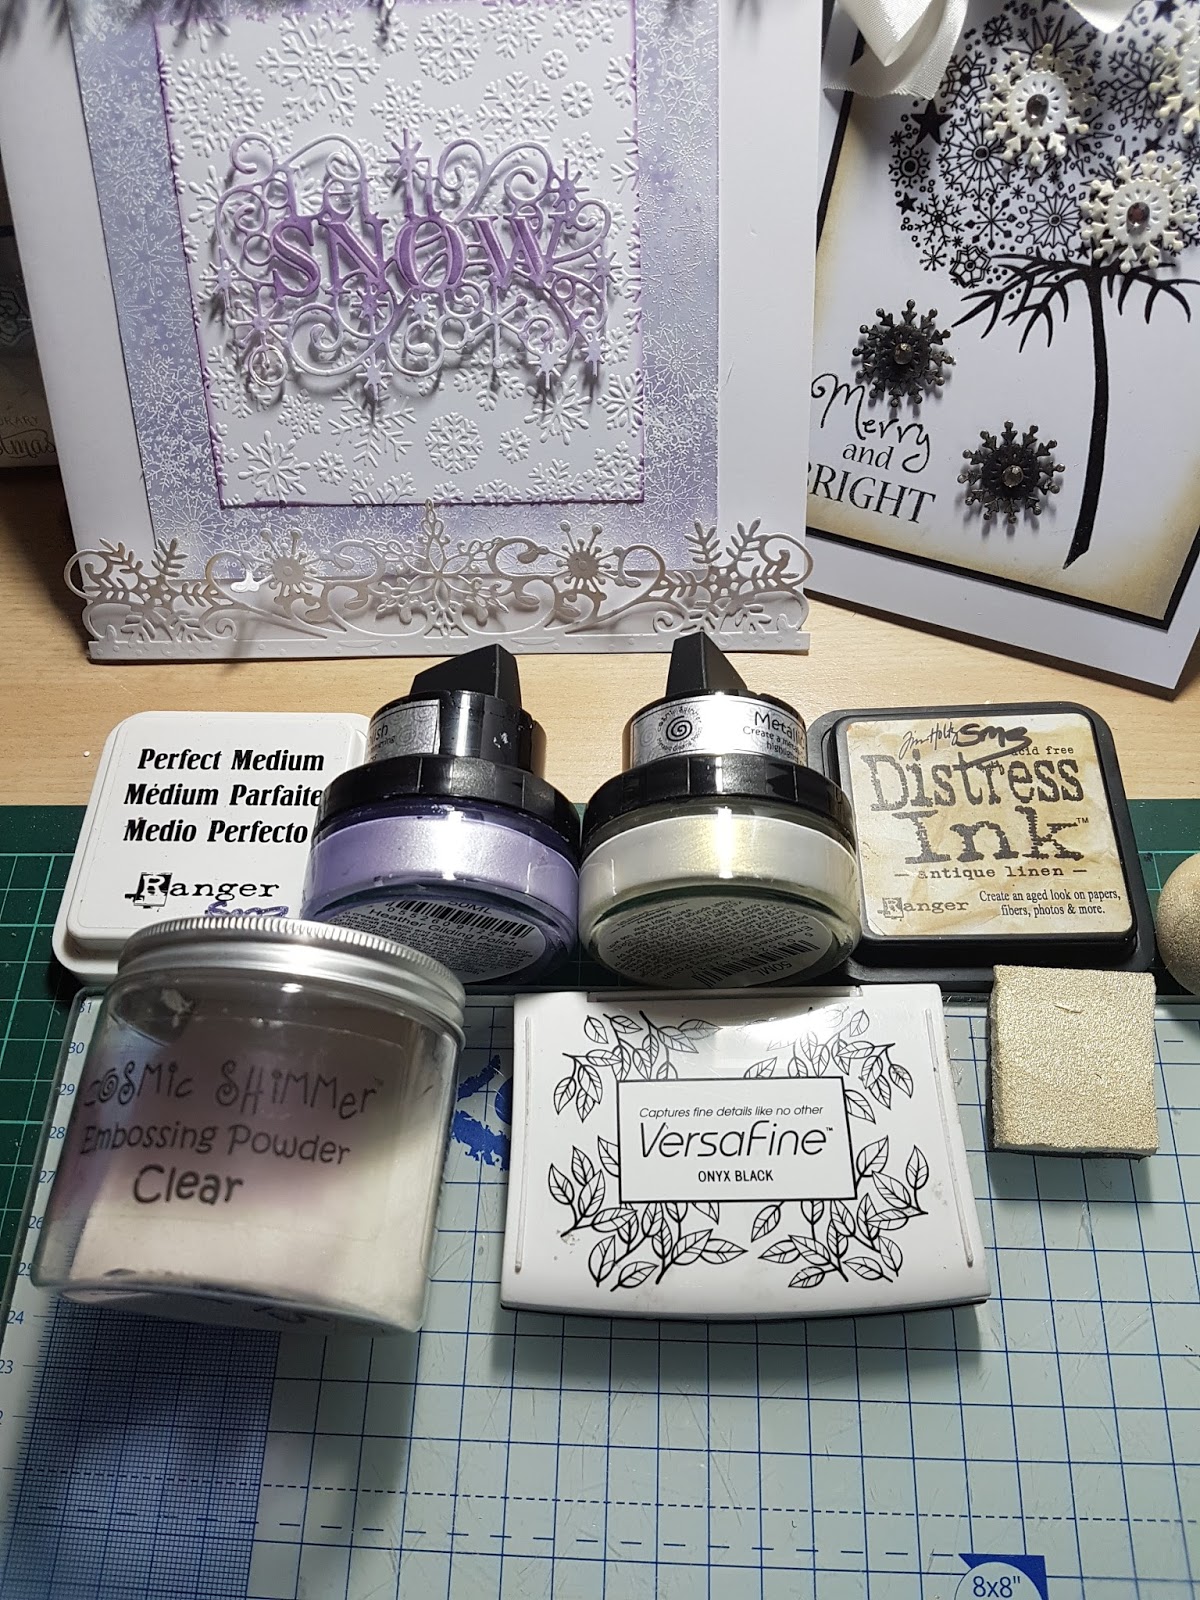
Here you can see the products I used to create both cards.


Country Garden Rose Die from Sara's collection

Leafy Swirl Die from the Lazy Daisy set

Distress Ink pads
Abandoned Coral
Squeezed Lemonade
Shaded Lilac


Black Versafine

With Love Sentiment Create a card Die

French Lavender Alchemy wax

Haybale Gilding Polish


The decoupage card is 7x7


I have used the Basket weave Texture embossing folder in the background.

Glue pen and Crystal Glitter, I haven't finished adding all the glitter yet I just took a couple of quick photos to give you some  idea of how the cards look.


This sweet little card should fit into an A6 envelope
and is made from one piece of A4 card stock.

OK so that's another year over with as our classes have come to an end, I truly hope you have all enjoyed them and I'm sure I will see you all back in the new year,  as far as I know the classes will start once again on the 5th of January if it is going to be any different I will post on the blog to let you all know.

Well all that remains for me to do now is to wish each and every one a very Happy and Healthy CHRISTMAS  and A BRIGHT NEW YEAR
Thank you for all the beautiful cards I have received and I shall see you soon.


Merry Christmas everybody xx Peace and Goodwill to All xx

Wednesday 7 December 2016

Will You Let It Snow - Last Christmas Card for 2016 Maybe!

Afternoon Folks, well only one more week of classes from tomorrow up to the 15th then that's it as they say or at least until 2017 and I think that we will be starting back on the 5th of January and I can't quite believe I've just said that somehow!! doesn't seem right another couple of weeks and it will be Christmas for real Ooooooh!!!! Got to get to grips with tree decorating this weekend before I miss the whole blinking thing lol! and I'm always on the last minute for goodness sakes think I could do with a few little helper elves to sort me out but I won't hold my breath on that one.
Okay last of the Christmas cards for this year................


8x8 Card


Antique Linen D Ink

Black Versafine

Embossing folder free with Inspiration magazine

Reindeer and Snowflake dies

Colorists pencils

Enchanted Gold Gilding Polish


6x6 Card


Creative Expressions Let it Snow die set

Nordic Christmas Words 8x8 Embossing folder

Festive Berries D Ink

Rich Red Gilding Polish

White Gesso


The frame has been made using the border embossing folder by Leonid.

The background and main image panel has been stamped with the gold gilding polish and a snowflake stamp. The Snowman image was also a freebie stamp set that came with the Inspiration magazine.


I colored the snowman hat and scarf with my Colorists pencils.


Sorry rubbish photos once again, the light has been terrible all day here.

The embossed background is Kraft card that has been painted with the white Gesso before it was embossed then the Red Gilding polish applied with some Cut n Dry Foam


Thought this week I would keep things nice and easy for you as our last class was quite labor intensive lol!

So not as many ingredients required for this class and I do believe you will be able to see in real time the way the gilding polishes really stand out which unfortunately does not come across in these photos.


See you soon x

Sheilagh

Wednesday 30 November 2016

Time After Time - Woodware Clear Magic Stamp

Is it really the end of November? Where did it go? That means my friends it is definitely December tomorrow and if you accidentally fall asleep or blink too many times then there is every chance you might miss Christmas and yes it is only 25 days to go........  Hi everyone, well seen as its the end of November I thought we could do something other than the usual Christmas cards so I have chosen this lovely little stamp from Woodward which I suppose you would describe as shabby chic come vintage style and I have teamed it up with a couple of dies to add the finishing touches.


Ok for some very strange reason unbeknown to me I couldn't type anything above this point on the page, not sure what's going on so I  must had to start at this point, if you look at the photos above you can see the products that I have used.

Tumbled Glass
Seedless Preserves
Dusty Concord
Spiced Marmalade
Peeled Paint
Evergreen Bough

Black Versafine

6x6 card


Clear Powder

Green Starlight Paint

Period Alchemy wax

Drawing Gum

Aubergine Dream. Pixie Powder

Graphite gilding polish

White Gesso

Gold gilding wax or polish

Fine round paint brush

Water mister

Blending tools

Forgot to put the WHITE GESSO in the photo shot !


8x8 Card

8x8 Clocks Embossing Folder
From Die'sire

Roll up Rose die from Sara Davies collection

White Gel Pen


Think that's it for now, as I'm experiencing some problems with trying to get this post sorted because I think Mr Blogger is playing up once again so I will finish now before anything else can go wrong and I loose what I have managed so far.

I will say very quickly for those of you who will be coming to classes this card has quite a few techniques to it so it won't be a quick one to finish.

See you soon x

Wednesday 23 November 2016

Make it with your Freebies!! - Inspiration Magazine issue 12 Winter

Hello! Sorry not much in the mood today as I have been suffering since class yesterday evening with my knee and a very troublesome backache so its taken me a lot longer today to complete the samples for classes, as I had already sort of decided in my head what I would be trying out but I just couldn't get started this morning and it was about 11.15am when I finally got to grips with it however I found myself having to sit down quite a lot and needless to say things did not go well, always the case when you really really need them too! Ah well it is done now so I am over it except that I'm not overly happy as they didn't turn out as good as my original ideas, hey! that's life don't you know?
Not going on and on about this as we all have bad days I guess..........
I used the free gift from the latest issue of the Inspiration Magazine, well the stamp set at least so here is my take on Sheena's stamps.


Apologies up front I seem to have run out of juice when the time came to take the photos so they are a little on the rubbish side this week.

Distress Inks
Dusty Concord
Peeled Paint
Evergreen Bough


Black Versafine
Clear Powder

Onyx Black Color Cloud kink
Heather Gilding Polish


Small round tip paint brush

Red pencil for the berries


Sara's Contemporary Christmas Range
Snowfall Embossing Folder
Holly Leaves Die


I did add the smallest touch of White Gold Starlight paint to the ink when painting the holly leaves just  to give a hint of sparkle.


Both panels have an aperture die cut from the center with layering circle dies.

Right that's me off to take more tablets and I will see you all in class, hope you lot are all feeling okay I know quite a lot of you have been feeling poorly recently so I hope you are all on the mend and back to good health.


See you soon x

Wednesday 9 November 2016

Let It Snow! - We shall see!

Afternoon everyone, I'm a little later than planned so please forgive me and thank you to all who have been waiting. Well can't say that I've seen any of that white stuff they were talking about last night on the weather but I know they have it further up north as there has been talk about it on good old Facebook. Guess there could be time yet for it to make an appearance who knows!
Right lets get a move on and show you just what I've been making for our classes which will start tomorrow......
This week we will be die cutting with a couple of Sue Wilson Christmas dies and stamping with a lovely Snowflake Flower stamp from Woodward.


Here are the products I used, as you can see I also added a couple of the small sized snowflake which was part of the free gifts in the most recent issues of the Inspiration magazine (issue 12 Winter)


Sorry you can't see the stamp too well I had to have my daylight lamp on as the natural light was so poor and its caused a bit of glare.


Distress inks
Antique Linen
Dusty Concord (no you are not going mad! I forgot to add it in so its not in the photo lol!)

Perfect Medium

Black Versafine


Clear Powder


Gilding Polishes
Heather
Enchanted Gold.


Background panel is stamped with the Snowflake Flower in clear ink and Embossed with White Powder.
Colored with Dusty Concord and both Gilding Polishes.


Small centre panel has been embossed in a snowflake folder.


That gilding polish really does light up the yardstick.


I forgot to say that this card is 8x8 in size.


Card two is 5x7

I didn't take many pictures this week as I mentioned earlier due to very poor light so you don't get the full effect from the highlights of the gilding polish on top of the Antique Linen which gives a beautiful finish to both the edges of the panel and the main image which by the way has been embossed with clear powder.


I will also say that the little snowflake die cut really well and I cut all of them in my Diamond Press without any trouble 3 from black and 3 from white 300gsm cardstock, well impressed!!
Well I think that's it so I will say bye for now and see you all soon x

Did I also mention.......................46 DAYS to go lol!
 

Wednesday 2 November 2016

Country Garden

Hello! Hope everyone is feeling well, me! I'm suffering yet again with another soar throat and a cough, really hoping it doesn't develop into a full blown cold or worse well fingers crossed as I  have demos booked for the next few weeks and I need all the energy I can muster and then there's the making of the Christmas cards, and so on and so on, you know how it goes don't you??????
Country Garden you ask? Not much of a clue in that title well I  can tell you that it is the name on one of the new 5x5 Create-a-Card dies from Crafters Companion and I think that they just might be the nicest ones so far and if you can manage to come along to one of the demos then you will be able to judge for yourselves, saying that one of my demos will be at the shop (Crafty Knits in Chorley) on the 19th of November which is only a couple of weeks away.


Black Versafine ink pad

Distress inks
Tumbled Glass, Squeezed Lemonade, Shaded Lilac and Vintage Photo

Colour Cloud Onyx Black
Gilding Polish Heather and Powder Blue

Fine round paint brush
Fine tip black Micron pen

Imagination Crafts Rusty patina paint
Cut n cry foam


Gilding Waxes
Antique Gold and King Gold
New from Pebeo


This card is 7x7


I have used my Basket Weave Distress Embossing folder on the outer frame and on the panel which is on the inside of the card, then used the gilding polishes to add color.


The sentiment comes  Sara's new Birthday Party stamp set.


This Easel card is 6x6

I used Vintage Photo Distress ink to color the front and inside panels then added some of the Squeezed Lemonade and Tumbled Glass to the main die cut image and the sentiment die cut panel.


You can't  really see it but I have added some of the Rusty Patina texture paint with the cut n dry foam around the frame which gives a real old vintage look almost like metal going rusty and you can feel the texture too, its really a cool product you could use on all sorts of projects.


The embossing folder on the inside is also a new one from Sara's Birthday Party collection.


OK ! So you've spotted the little photo I have included below, well I thought I would try and get you all a bit more in the spirit of what will be in the next 53 days lol! lol!


Look at the pretty lights!!!

See you soon
Sheilagh x
Photo taken at Birkacre Garden Centre

Wednesday 26 October 2016

Noel - 60 days to Christmas

Hey! Hope everyone is well its  been such a busy week once again and there's going to be no let up for the next four weeks at least as I have a demo on every Saturday so it's busy, busy, busy B and no rest for the wicked lol!
Here we go very much in fast forward mode.........................zoooooooomm..................
This beautiful stamp from Woodward - NOEL which says it all for the approaching season.


So this week two cards one 7x7 & one 5x7.


Distress inks
Aged Mahogany
Tea Die
Frayed Burlap
Tumbled Glass


Black Versafine

Gold Embossing Powder

Clear ink pad


I used Gilding Polishes
Gold and Turquoise


I have paper pieced the tags on the Noel stamp with papers from Papermania 12x12 pack.


This time I have stamped and embossed with Silver Powder.


Distress inks
Chipped Sapphire
Iced Spruce


I decided to team up the Noel stamp with a Creative Expressions Christmas background stamp.


I have stamped a background using the Memento Rich Cocoa ink pad.


I die cut two Holly sprigs from a Sue Wilson die set
and coloured with the inks and a touch of the gilding polish.


I have also used a tiny amount of Pearl Gilding Polish around the edges of  two of the panels.


Sorry the photos don't do justice to the finished cards but I will try and take some better pictures first thing tomorrow as I  lost good light by the time I got them finished.


See you all soon x

Wednesday 19 October 2016

Birdy Towers

Hi there, it's going to be a super quick post today as I have been suffering with a painful backache which kept me tossing and turning all night and it seems as if I  have taken all day to get things sorted out for the classes so I am going to give you a somewhat brief description of the cards and what I used on them.  This very cute stamp is from Woodward and is called Birdy Tower and you can see why, they also have a few more in the same style, different designs. So useful for your quick cards but they also work on larger cards as well.


8x8 card

Background panel.
Distress inks
Aged Mahogany
Vintage Photo
Mowed Lawn

Rich Red Gilding Polish


Clear ink and White powder

The stamp is embossed with white powder onto Kraft card.


The birds have been painted with distress inks and Red Starlight paint, I used a round fine tip paint brush

Once the border strip was embossed in my folder (wood grain) I added a touch of Peridot Alchemy wax.


The leaves have been die cut and inked with the Mowed Lawn D.I.
Then I have added Peridot and also a hint of White Gold starlight paint with cut n dry foam.


Leaves from Sara's Autumn Morning collection.


It's such a shame you can't get the full visual effects of the waxes and the paints together.


Decided to make a DL card as I thought this size of stamp was just perfect for a quick make card.

The birds are stamped in black Versafine and embossed in Clear Powder.

Them I painted over the image with my Drawing Gum to protect it before I created the background using a large flat paint brush and Sax Blue Starlight paint and water to thin it out a little.


Once again I have used the Red and also Topaz Starlight to colour in the birds.


So that's it for now and I'm sure you will all be pleased that there is no cutting out by hand this week just a tad of painting to do lol!

At least you will have two more Christmas cards ready to add to your collection, and I haven't even got one as yet maybe one of these days I will sit down with you all during class and make them as well Ha! Well you never know stranger things have happened. : )


Later! x