MY CRAFTING ADVENTURE

My journey through crafting collecting goodies along the way x

Wednesday, 18 May 2016

Art in a Stamp - Imagination Crafts

Morning All, hope everyone is well just finished our next lot of cards for this week and next week's classes.
Something a little bit different using the Art Stamps from Imagination Crafts along with the Sparkle medium, Starlight paints and Alchemy Wax, hope you like them.
For the first card which is a 5x7, I have used Black Stazon ink onto Acetate then applied the Sparkle medium onto the reverse with my pallet knife and I have to say that the results are pretty good if not impressive, well I think so and it's a pity that the photo's don't show it as good but it is difficult to get a good picture when photographing anything done on acetate because there's so much reflection.
Anyway you will see what we shall be doing only it will look much nicer than my photos.
On card two I used my Amethyst Starlight paint for the background and once again I stamped onto the acetate with Black Stazon, its always best to use your anti-static bag first because you know how smooth and slippery the surface is.
Both cards have an embossed background panel and for these I used two of Sara's new folders from her Signature Collection English Country Garden, one I applied wax onto and the other I have inked the folder with my Dusty Concord ink pad. Lets have a look and see what you think ????


Black Stazon
Dusty Concord
Amethyst Starlight paint
Cobalt Alchemy Wax
Plum Cobbler Colour Cloud Blending ink
Paint brush flat ended


Think my Diamond Press is photo bombing don't remember it being there and it's not part of the requirements this class lol!


This is the 5x7 card with the Sparkle medium image.


Cobalt blue Alchemy Wax on the embossed black background.


7x7 card. This has the Amethyst Starlight paint image.

I love these paints they really reflect in the light.


Plum Cobbler and Dusty Concord have been used to create the two background panels.

Black Versafine ink for stamping the sentiments

 Just experimenting with the photo editing program but gave up as time is too short to have a play and enjoy ones self lol!


Didn't improve things any as you can clearly see the light from the window very prominent because of the reflection on the acetate.


A better shot here out of direct light.


Well that's it folks for another week hope I have encouraged you to get your sparkle mediums out and have a go, and just before I go I thought I would show you these last two photo's that I took a couple of weeks ago of the one and only Shadow that naughty little black cat that decided to live in our house over a year ago as the Boss or so Shadow thinks!!!!!!!


Don't think you are going to watch what you want Mrs. And NO you can't have the remote back, just try and take it!


If you think I'm going to move think again!

you shall not Craft!

Food it is then ha!

See you soon x

Wednesday, 11 May 2016

To Woodware - An Old Letter - from Daisy May & Dotty Flowers.

Good afternoon everybody hope it's dry where you are today it has stopped raining here at the moment but it's still warm so I'm not complaining and at least the garden is happy for now. We had a good demo day at the shop on Saturday with the lovely Karen from Stix2 and I really enjoyed myself as I got to take part for once and it made a nice change for me not having any stress and just a relaxed playtime, can't wait for the next one which I think has already been booked for August but I will have to check with Louise about the date and then I can let you know. I have to thank Karen for giving me the inspiration for our classes this week as I have used some of the stamps that were available on the demo day and of course they are all from Woodware and I for one will be putting them to good use and making  lots of goodies with them. I think quite a few sold out but I'm sure Louise will be sending another order for them so they should be back in stock soon.
So what have you done with them I hear you cry? Well I decided to keep things almost the same except for the fact that I have made cards with them but on demo day we made a canvas bag and it was fun to do something a little different so who knows we might even get to do this in class so watch this space........
For these 5x7 cards I have used three of the Woodware stamps sets and I have to say that they are great value for the money, so inexpensive and perform beautifully every time even on fabrics.


Ok nice and simple this week.

Memento ink Rich Cocoa
Ripe Persimmon Distress ink

I used my Quickie glue pen and my Glamour dust.


I have paper pieced the stamped image known as Daisy May over the background Old Letter stamp.


When you stamp your image more than once onto different papers or fabrics  you can mix and match and make two different images if you get what I mean.


The small butterfly has been die cut from double sided sticky sheet then Gold Craft Foil placed on top to add just a little accent in the corner.

I have distressed the edges of the background panel with some Ripe Persimmon then added a tiny border of glitter with my glue pen.


Onto the second card, I created a mask through which I have inked with SHABBY SHUTTERS & CRACKED PISTACHIO Distress inks then stamped this lovely Dotty Flowers image to create a very simple yet stylish look.
I have stamped the flowers in Black Versafine ink.


I coloured the leaves in with my Spectrum Noir pen then stamped the small sentiment on each side before adding faux stitching with my Micron Fineliner Pen, not very straight don't think I had my glasses on at the time which is not such a good move as you can see lol! Pity I couldn't, not to worry we live and learn so they say.


Black Versafine to stamp the sentiments.


A touch of Stickles glitter glue just to finish off.

Well that's me off for my lunch now so I'll see you later.
Have a good afternoon, it looks like the sun is trying its best to make an appearance, go on you know you can do it ⛅
Sheilagh x

Wednesday, 4 May 2016

Pinwheel Daisies Just Rite

Good afternoon didn't think I would get this far today but somehow I've managed to carry on despite all the coughing and sniffling going on due to yet another cold which started just before weekend, so for that reason I will make this post as short as possible and see how it goes, fingers crossed and tissues ready.
Two rather simple and straightforward cards for this week as my brain just doesn't want to know right now so please forgive me as it has take quite some time to get to grips and actually finish one card let alone two as nothing would go to plan it just went from bad to worse till I finally gave up and this is where I have arrived, woe is me! all together now Aawwwhhh!!!!
Moving very swiftly on as I feel the need to get myself another tissue but before I do I'll tell you that the cards were made using the Pinwheel Daisies stamp set from Just Rite Stamps along with some Colour Cloud inks, Waxes from Imagination Crafts, Clear ink pad, Black Versafine ink, Clear and Gold Pearl Embossing Powders. The embossing folders are both from Crafters Companion and the Have a Wonderful Day sentiment was free with one of the Inspirations magazines.
Card one is A5 (A4 half fold) and card two is a 6x6 square.
I will show you a couple of photo's so you get an idea, if you wish to change the colours that's fine but you will need to bring your inks, I have used a small fine paint brush to paint some of the flowers with the Waxes.


Colour Cloud inks
Lemon Meringue
Basil Leaf
Turquoise Pool
Crimson kiss
(these are what I used to make both cards)


Waxes
Pink Tulip
Peridot
French Lavender
Japanese Jade

Black Versafine
Clear
Mustard Seed


I started out with the stamped image in Gold embossing powder but for some reason it looked odd then I realized that there was something wrong with my powder it didn't melt as it should have so I guess it's passed its sell by date so I had to try again but I only had Gold Pearl powder so it's not as bright as I wanted. The panel has been coloured with the Cloud inks and waxes added but you can't really see it in this photo.


Sorry it was short and sweet but I really must go now and take my tablets  to clear off this infernal cold.
See you soon  x

Wednesday, 20 April 2016

All about the Textures

Morning folks, hey! the sun is out and once again  I'm off to take classes and won't get to see much of it but it's nice to know that it's shining and gives us that feel good factor to start the day.
Something a little different for this week and less taxing, I have decided to get the good old texture embossing folders out and what better than to team them up with the Pebeo Gilding Waxes, all three colours that is....... and hey presto a very easy make with the WOW! impact, couldn't be any better.
The Embossing folders are the Texture folders from Crafters Companion and there is a quite a few to choose from so I  decided to use four or five for our class this week, and of course the essential black card.  keeping it simple is this weeks key so I chose to die cut a Dragonfly or two as my extra embellishments ( you could use a butterfly or a flower if you don't fancy the dragonfly)
The card I have just described is of course an 8x8 Square and the next is going to be a 6x6 again a simple theme for this one is also in order.
One the second card I have used an embossing folder and Distress inks Frayed Burlap and Vintage Photo I also added in to the mix Stormy Sky, Faded Jeans and Forest Moss. I think by using these colours it gives the card a slight vintage feel.
OK I'm off to work now so I'll post the photo's later today.
See you later x
Just a couple of photo's to give you an idea, I decided to add in some coloured Alchemy Waxes to the finished card as it looked a tad dark.


You might want to bring some Cut n Dry foam to apply the Waxes,

Wednesday, 13 April 2016

In the Downton Abbey Decor Fashion

Hello here we are again and I hope you are all enjoying this lovely sunshine unlike me as I'm busy crafting my way to the next demo day this coming Saturday at Crafty Knits in Chorley so if you're free then come along and join us as there is sure to be lots of laughter and no doubt a little mayhem in the midst of our crafty event.
Well as this weeks title suggests we are visiting Downton in our card classes and I have to say I am really loving these dies and I have only just begun to use them so that's a good sign for me.
Our first card is a little different and I would imagine it could be made into a card for any occasion which proves to be very useful in deed.  I started with a 7x7 square card and then die cut this rather beautiful and quite substantial Downton Décor panel from black cardstock which I have to tell you cut like a dream. Next I got my Waxes and worked on the panel and hey presto instant inspiration.


Clear Ink pad
Clear Powder
Black Versafine
Pumice Stone Distress ink
Silver Pebeo Gilding Wax
Coral Reef Alchemy Wax
Mini blending egg
Fine round paint brush


I have used two of the  bow dies from the Downton Abbey range as my main embellishment and two small panels from the Ornate Rectangle Frame set.

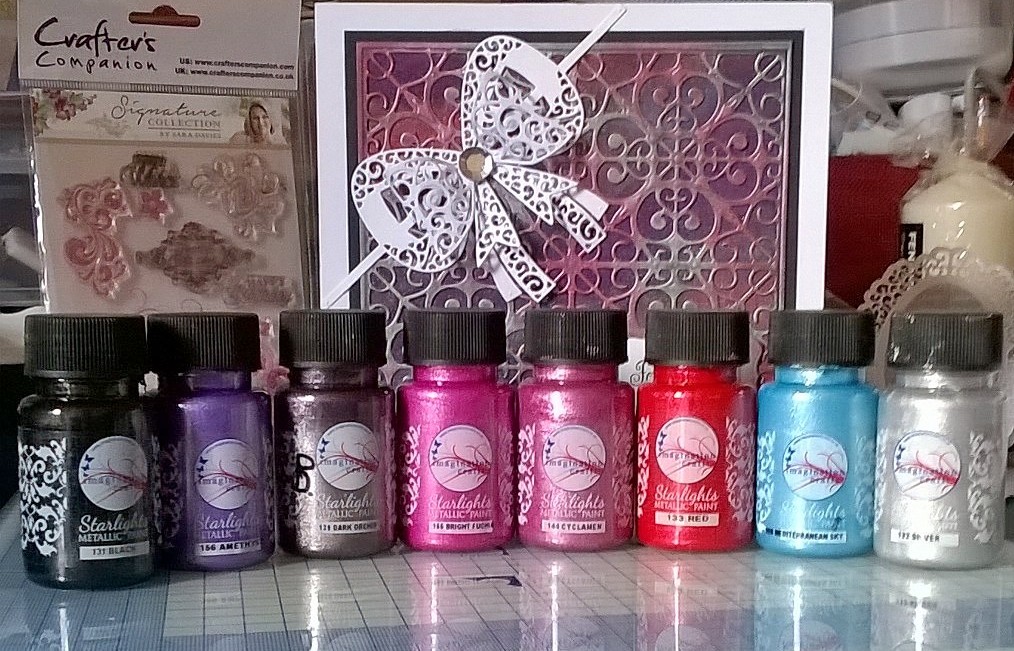
Here we have a selection of colours from the Starlight paints to create a background onto which the beautiful Downton Décor panel can be added.

I did however use my Vintage Sparkle Pens to make the background in this card but the Starlight paints will work just as well so you can have the option if you want to use your own pens that's fine.


Think this photo is a little blurry it could be a reflection on the gliding wax.


Now onto card two.
So sweet and petite the base card has been cut from the new Ornate Oval Frame, as like all the frame sets they make such cute little cards and are super easy to do.
I teamed them up with the stamp set from Sara's Floral range as they go perfectly together


Well that's me finished for now I don't think lol! Back to the die cutting, so many dies need to be set free from their packaging but which to choose next ????????????
Think I should pop the kettle on it's going to be a very long day.
See you soon  x

Thursday, 7 April 2016

Saucer Flowers on an Easel

Hello on this very wet and windy day, what a week I've had but no time to moan or should I say tell you about it so lets get straight to the important stuff. This week I have used a Woodware set of stamps called Saucer Flowers and to go with them I decided to revive my tiny pots of good old Mica Paints to colour these rather unusual shaped flowers. I have made a 6x6 box which the easel card strands on top of and created my backgrounds with Distress ink pads and a touch of Imagination Crafts Alchemy Waxes. To complete the look I was after I have embossed the box with my 8x8 Pebbles Texture folder.
You can choose any colours you prefer to create your box card and any design of folder as long as it is 8x8 or A4 in size.
Finally I have used the Dragonfly stamp from the free set that came with the last issue of the Inspiration magazine to create my embellishments from. They have been stamped onto acetate with Black Versafine ink and embossed in clear powder. I then coloured them on the reverse with my Starlight paints. If you don't fancy the Dragonflies you can use the Butterfly stamp instead.


Here's a couple of photo's to give you an idea of the colours you could be making but if you want just bring the colours you prefer  to use and a couple of blending tools.

You will need a fine round paint brush to paint your flowers and Dragonflies and also an anti-static bag.

If you don't have any of the Mica Paints don't worry we have quite a few colours you can use in class.

Sorry about the quality of the pictures I'm still having trouble with my tablet and now my phone and I need to get it sorted as soon as I get chance.

See you soon x